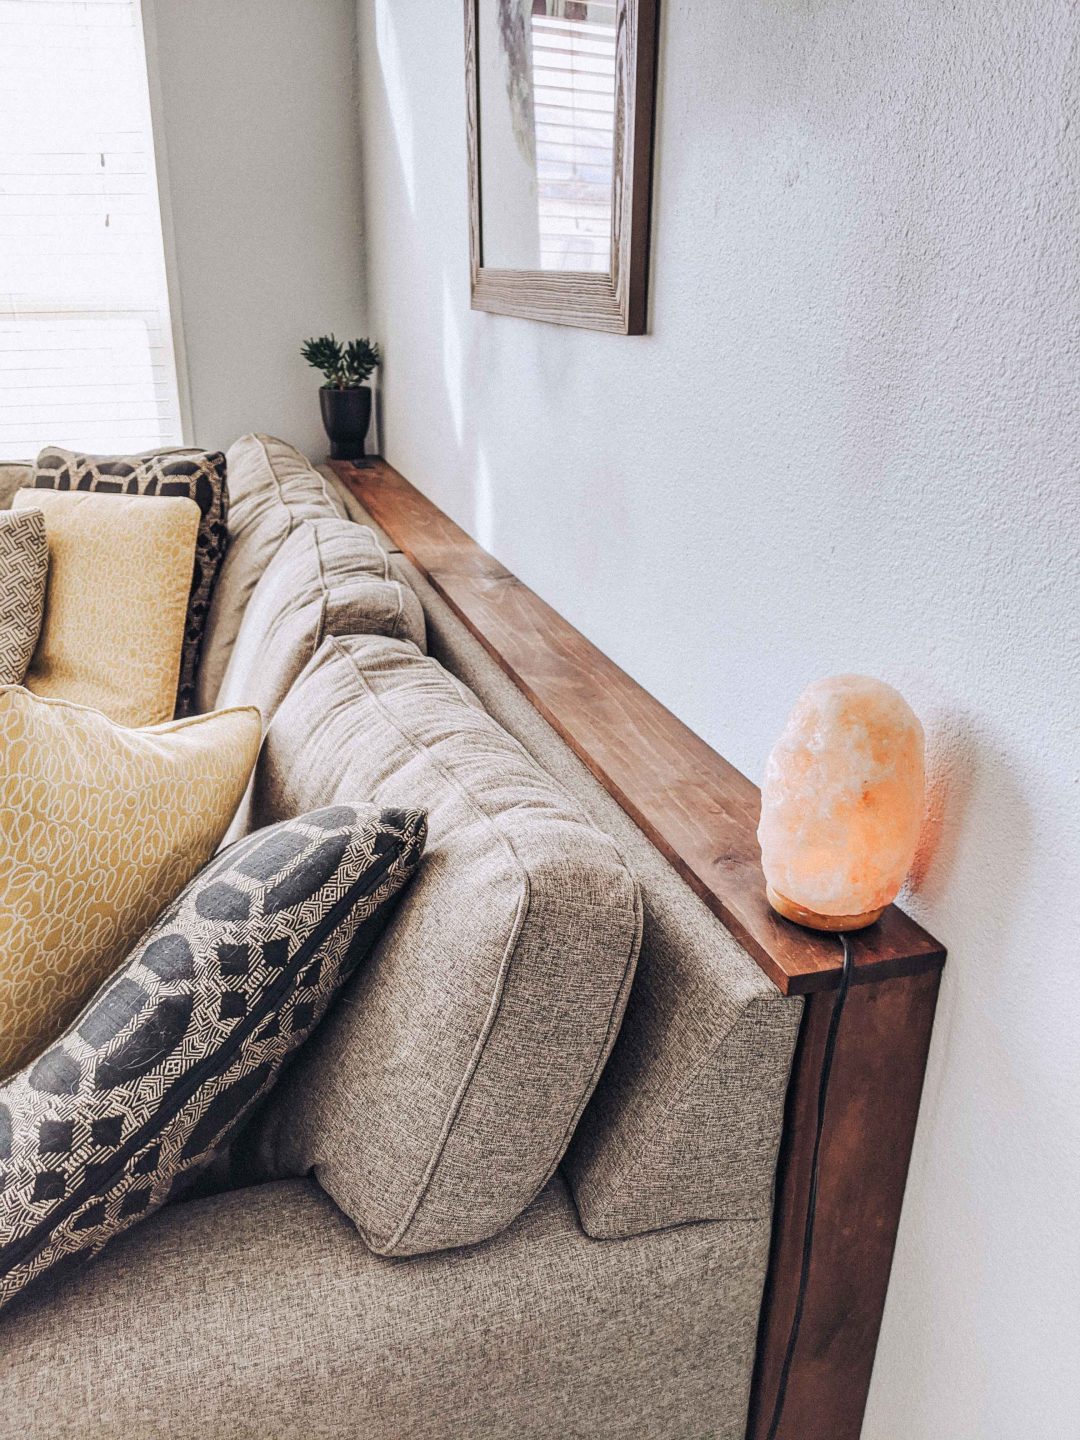
When we got our new sofa I knew we’d need a little extra help in the table department. Travis had made one in our old house with some 2x4s that I really liked, so I figured this time around I’d take it to the next level. So, here is what I planned to do for our new console table.

Items needed:
I cut all the pieces to size, measuring the height and length of the side the table would be going. I choose to keep the top piece, which runs the full length of the sofa, the full width of the 1×6, but ripped the legs down to 5.5″ so that the top would overlap the couch slightly. I then cut additional supports from the 2×4 so that there wouldn’t be any sagging. I cut smaller 16″ pieces with some remaining 2×4 to support the corners, creating more stability with the legs.


I chose to stain the visible pieces before putting them all together, thinking that might be easier. In the end, I don’t know if that was the case so choose your own adventure on that one. I cut a hole in the center of one of the sides to add in a recessed power strip with USB chargers for easy cell phone charging and an easy access to an outlet. I’d wished we’d had this in our last table, so this was a definite add this time around.
I attached them all with 1 1/2 in screws and sunk them in slightly, covering them with wood filler, that I then stained over. This was the first time for me using this product and it sanded down pretty well, but was still more visible than I would have liked in the end. I think my technique needed a little work. You could also use a nail gun or sink your screws using a Kreg Jig.


I also added a layer of poly stain on as I knew we’d be putting beverages and the like on this. I’ve learned that when in doubt, add this step. It takes a while longer to dry, but in the end it will be totally worth it. Final step. Screwing in the recessed power strip and BOOM she’s complete. Completed in almost a day, to let the poly dry, and now we’re off to the races. Definitely a win for under $50.


No Comments